The Arobo wireless remote software is not free. You can download it and use the built in simulation to see how it works, but you will need to buy a security key to enable it to send commands to a real PowerTroll.
Download and unzip the most current version, then install in the usual palm pilot way by dragging the .PRC file to PalmOne QuickInstall and HotSync'ing. Special instructions for installing Arobo on the Palm simulator are in the README file in the zip archive. The Arobo application will appear on your palm as below:
: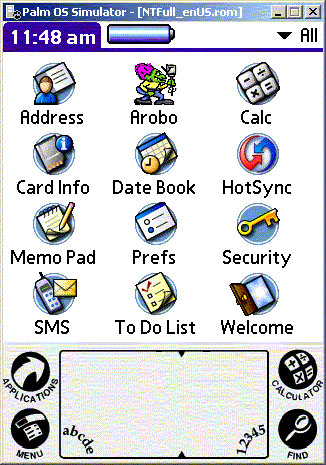
Tap the Arobo icon to launch the application
After the initial splash screen goes by you will see the heading form where most of the control functionality resides.
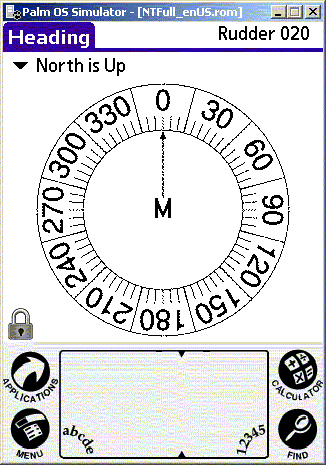
Of course the most obvious feature is the compass rose and we will look at that shortly, but first, note the lock icon in the lower left corner. This means you can't send commands to your PowerTroll (because you have not yet connected to it).
In the upper right corner note the "Rudder 020". That's saying the rudder (aka, position of your trolling motor) is about amidships between 0 and 40. If you tap on the "Rudder" text it will change to "Desired 000", and if you tap again it will change to "Current 000". These are the desired and current direction.
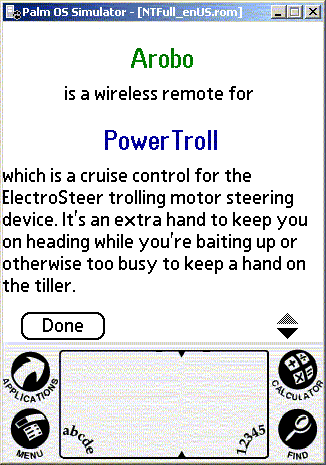
Just about now you'll get a dialog (as below) saying the PowerTroll is not sending. This is normal since you aren't connected, but if it happens on your boat while you're using your PowerTroll it means something's wrong (did the PowerTroll get unplugged?)
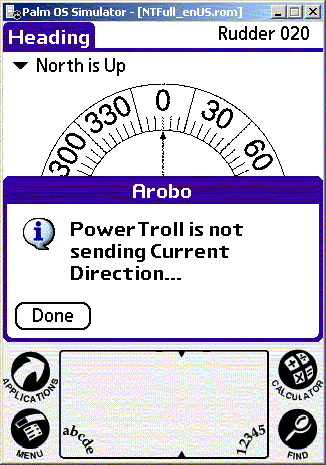
This message will appear every 2 minutes until you reconnect. Tap the "Done" button to make this warning go away for awhile.
Now tap the "Heading" tab in the upper left corner (or the menu key in the lower left) to start examining the menus.
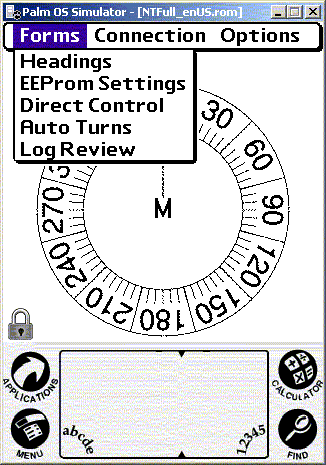
The "Forms" menu displays all the forms you might use to control your PowerTroll. These will be reviewed later. Tap on "Options" next
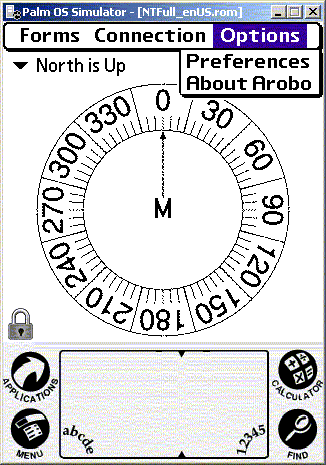
This menu allow you to establish some operational defaults and accesses some information about the software. Tap on "Connection" next
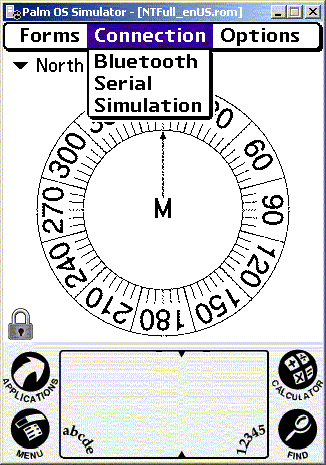
This menu allow you to connect to your PowerTroll by a wireless Bluetooth adapter or a normal serial cable. It also allow you to connect to Arobo's internal PowerTroll simulation.
Most will want to use Arobo as a wireless remote via the Bluetooth connection, but it can also be used "wired" via the Serial connection, especially useful with an older Palmpilot. These older Palmpilots are available on Ebay for about what it costs to ship them.
Using the simulation is a good way to become familiar with the Arobo remote control and how all it's features work before you take it out on your boat. But don't assume the simulated boat behaves much like your boat will. It isn't a very sophisticated simulation and it's behavior is slanted towards rapid visual feedback, not 'realism'.
Start the simulation by tapping that item on the above menu
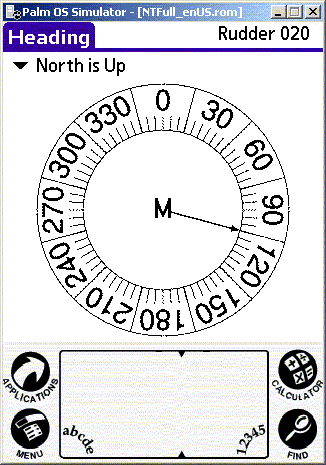
Momentarily three things happen: the lock icon in the lower left corner disappears (meaning commands can be sent), the arrow changes to point in some random initial direction, and a blinking degree symbol appears in the upper right corner. The blinking degree is immediate confirmation that the PowerTroll (in this case the simulation) is sending heading and rudder updates to Arobo.
Notice the "M" in the middle of the rose. "M" means the PowerTroll is in manual mode, i.e., it does NOT use the compass to hold a heading. You can switch from manual mode to automatic mode (where it DOES use the compass to hold the heading) by tapping the "M". When you do you will see another popup
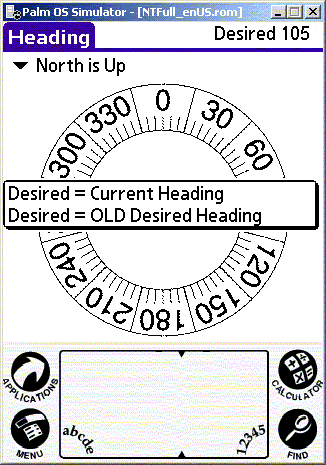
This is asking if, before going into automatic mode, you want to set the desired heading (to be held) to the current heading, or whether you want it to return to the old desired heading. Select Current heading and see an "A" appear in the center of the rose, denoting automatic mode. If you tapped the "A" it would return to manual mode. There is no popup going from automatic to manual.
Prior displays have shown only a single arrow from the "M" (or "A"), but notice below two lines, one with an arrow head and one without. The line with the arrowhead is the current heading, the one without the arrowhead is the desired heading. On prior displays these overlapped.
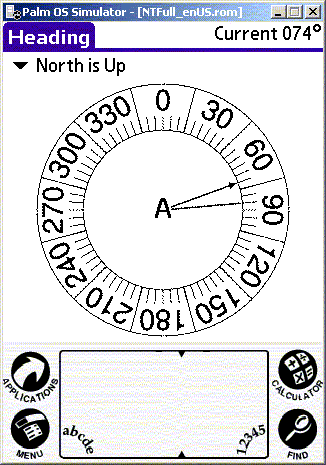
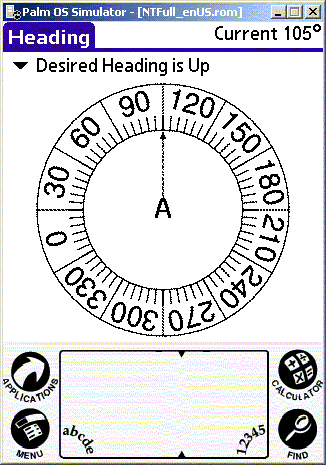
The compass rose can be oriented three ways, depending on the setting of the popup menu above it:
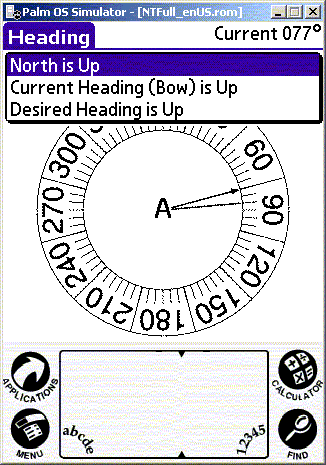
When "North is Up" is selected the rose appears as seen before, with North (0 degrees) at the top of the form. When "Current Heading (Bow) is Up" is selected the rose is dynamic, rotating as the boat turns to keep the current heading up on the display.
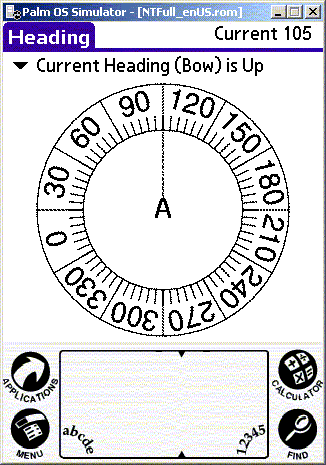
You may notice there is no arrowhead shown. That's because only the "North is Up" orientation requires two lines. The arrowhead line (current heading) is by definition up in the "Current Heading..." orientation , so it is not shown. Similarly, the non-arrowhead line (desired heading) is by definition up and does not appear in the "Desired Heading..." orientation below
Switching back to the "North is Up" orientation, let's see how to change heading. There are two large unlabeled, un-outlined buttons on this form as indicated below. Tapping these "hidden" buttons sends commands to the PowerTroll to either change rudder position (in "M" mode) or alter desired heading (in "A" mode).
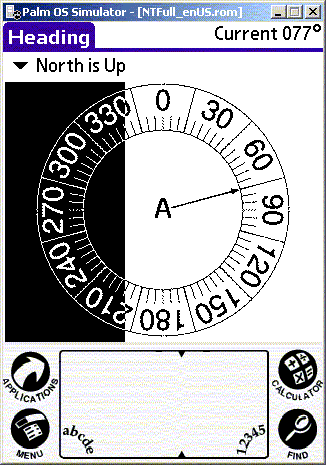
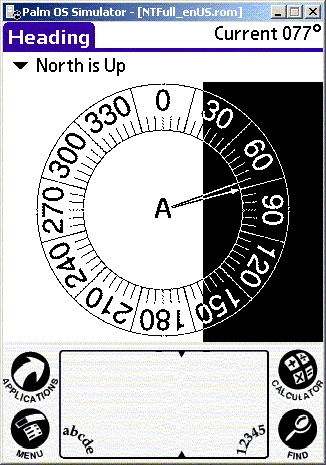
Tapping the left side of the form is equivalent to pressing the DN button on the Electro-Steer control, and tapping the right side is equivalent to pressing the UP button on the Electro-Steer. To wit, in "M" mode, Press one of the wired remote control buttons and the outboard is steered one direction; Press the other button and it is steered the other way. In "A" mode, Press one of the wired remote control buttons and the desired heading is changed to port; Press the other button and the desired heading is changed to starboard.
Arobo does not do continuous steering, but rather steers a fixed amount for each tap. So one tap would change the rudder by 5 (tenths of a second) in "M" mode, or change desired direction by 5 (degrees) in "A" mode.
This is a good time to note that Arobo does not replace the Electro-Steer switch in controlling the PowerTroll - it supplements it. If you are using Arobo then both controls are active. Also note Arobo does not maintain state; when you tap a control such as "A" Arobo does not go into automatic mode, it just sends a command to the PowerTroll to do so and the "A" does not appear in the middle of the rose until the PowerTroll sends back that it is in automatic mode. This means you can use the controls interchangeably. Press both buttons on the Electro-Steer control to switch from "A" to "M" and that change is also reflected on the Palmpilot.
But while Arobo can do all the Electro-Steer control can do the reverse is not true. The PowerTroll can do automatic turns but there is no way to initiate those turns from the Electro-Steer switches. Arobo initiates these turns on the Auto Turns form
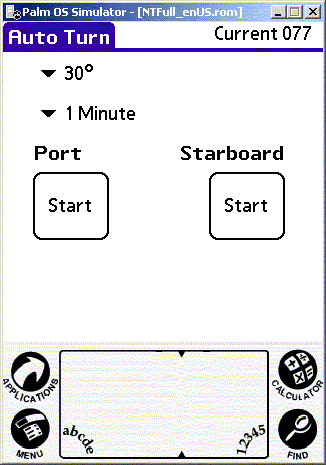
To start an automatic turn you need to specify how far to turn (number of degrees), how fast to turn (how many minutes to turn requested number of degrees), and which direction (to port or to starboard). The first two are specified in pop up menus
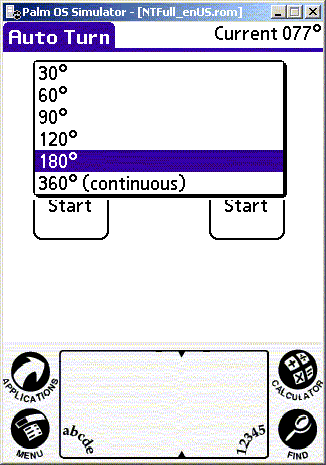
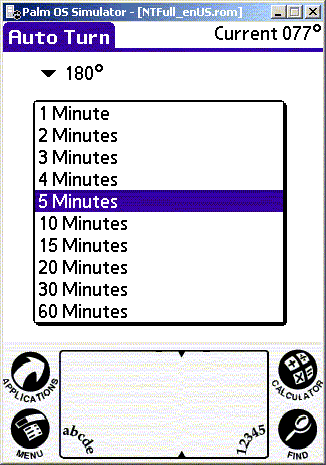
and the direction is selected by which of the two "start" buttons is pressed. When a start button is pressed a "stop" button will appear displaying turn progress.
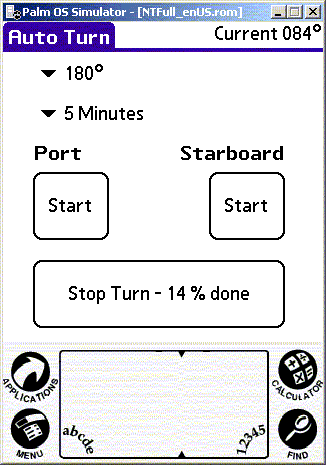
For a 360 degree continuous turn it will simply say "Stop Continuous Turn". Note that the time for a continuous turn is the time to change heading by 360 degrees, but that the turn will continue beyond 360 degrees indefinitely until manually stopped. Also note that while a 360 degree turn might end up being a circle that will only happen in the absence of wind and current. Otherwise there will be some kind of net drift. Being compass based instead of GPS based means PowerTroll getting back to some original point is unlikely.
Besides the Stop button, ANY command from Arobo or from the Electro-Steer switches will terminate any automatic turn. But that doesn't mean you have to stay on this form - you can switch back to the Headings form if you like, or even turn the Palmpilot off till you need it again! When you later come back to the Auto Turn form it will show you the current turn state (unless it finished).
Turning now to the less used forms, the Direct Control form can be used like the Electro-Steer switches to operate the rudder.
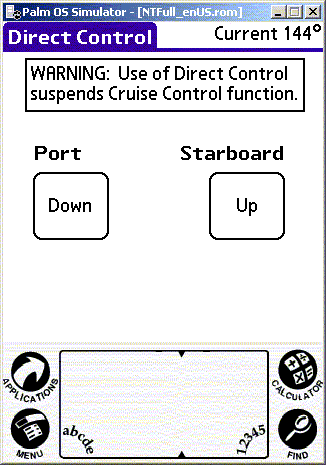
This is a leftover from an earlier version of Arobo before the control functionality was added to the Heading form, and this form may disappear in a future version.
The EEProm form displays and allows changes to the PowerTroll internal control constants. These are the constants defined and set using "p2test10" during construction of the controller, and more complete documentation of them can be found in the construction manual. A brief description is available in Arobo by tapping the ? box to the right of the value.
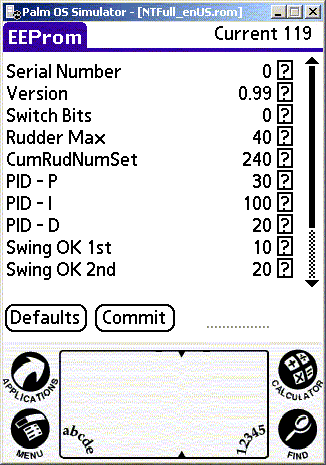
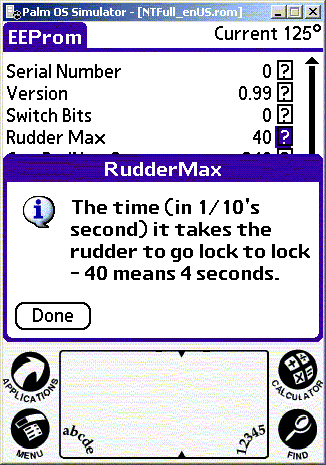
Tapping the "Defaults" button changes all the EEProm constants to the values hardwired into Arobo as the defaults. These are probably NOT the values you choose when you built your PowerTroll! Tapping the "Commit" button sends all the changed values to the PowerTroll's EEProm. In many cases these changes will not be effective until the PowerTroll is powered off then back on. If you do not want to commit the changes don't tap the Commit button! To see the current values after you have changed some but not committed them just select some other form (Headings?) then select EEProm again.
I recommend you not make changes to these constants "on the water" with lots of other stuff going on. Make whatever changes you think necessary "at the dock".
I do not recommend you make changes to your PowerTroll based on how those changes affected the simulation! As I noted earlier, the simulation is not very sophisticated and its behavior is probably very different from your real boat.
The Log form is for capture and display of traffic between Arobo and the PowerTroll. At this time it is of little use, but a future enhancement to Arobo will analyze captured information to develop PID tuning recommendations.
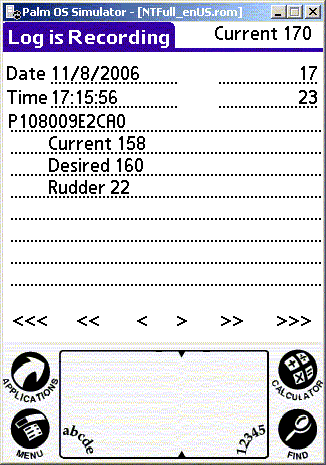
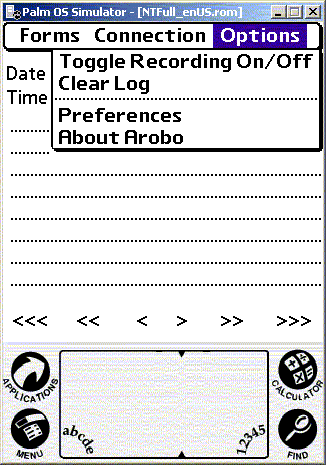
The form tab show whether the log is being recorded "Log is Recording" or not "Log is not Recording". This state can be changed by the top item in the Options menu. The Options menu also provides for clearing the log.
The form shows one log entry at a time. The date, time, and raw entry are show at the top left. The record number of the log entry and the total number of recorded entries are at the top right. Some entries are decoded on the lines just below the raw entry.
At the bottom of the form are controls to navigate the log. The "<<<" and ">>>" buttons select the first and last entries in the log. The "<< and ">>" buttons select the previous and next "application start" entry - essentially the "session starts" in the log. The "<" and ">" buttons select the previous and next entry.
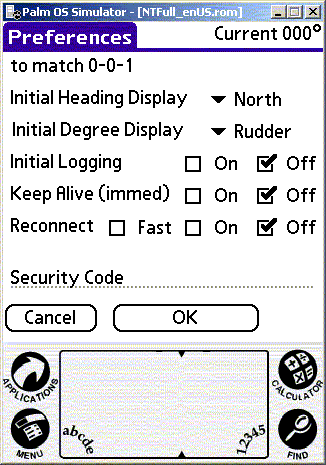
A number of Arobo parameters, (such as whether the Log is recording or not at startup) are settable on the preferences form.
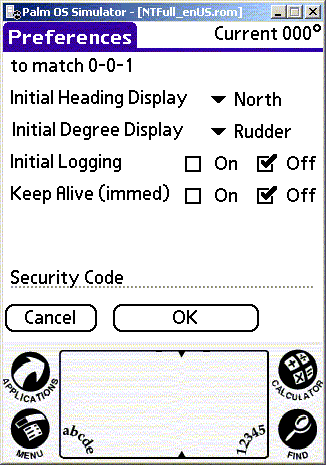
In the upper left corner of the form it shows "to match x-y-z" where x is serial number of the PowerTroll, y is version number of the PowerTroll, and z is Arobo's version number.
Version numbers shown are the whole number part of the version/build numbers shown elsewhere and relate to the software level, in one case for the software in the PowerTroll controller itself, in the other for the Arobo software on the Palmpilot.
The serial number is a unique number associated with the PowerTroll software and used to ensure a wireless remote is talking to the correct PowerTroll. A unique serial number is provided with every PCB. If you build your PowerTroll on your own PCB or perf board send me an email and I'll reply with a unique serial number you can use. These serial numbers aren't rocket science - you can make one up yourself easy enough, but suppose someone near you picks the same one? You haven't lived till you've watched two boat accidentally controlling each other's outboards! A true 'who's on first' experience!
Above, "to match 0-0-1" means 0 is the unique serial number for the internal simulator (obviously not unique, but also obviously not needing to be unique!), the second 0 is the whole number part of version 0.99 which is what the simulator always reports, and the 1 is the whole number part of version 1.0 of Arobo.
Below the "to match" is a popup selecting what the startup heading display will be. Choices are "North is Up", "Current Heading (Bow) is Up", etc. Below that is another popup selecting what the startup top right corner display will be. Choices are "rudder", "current", and "desired". Below that is a set of checkboxes determining whether logging will be initially on or off, and below that another set of checkboxes determining whether the Palmpilot should be allowed to go to sleep as specified in its global preferences (Power setting in Prefs application) or stay powered up until you turn it off.
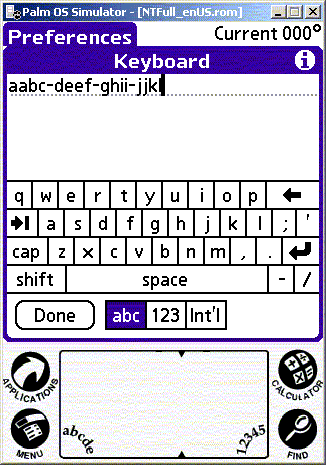
Finally, there is a editable line marked "security code". This line is for the entry of a code assigned to match the "to match" line and allow Arobo to send commands to the associated PowerTroll. This is a 16 character code, in groups of 4 digits separated by minus signs. Of course since the code is "to match" it is necessary that the associated PowerTroll be actually connected when the code is entered. I also recommend you use the Keyboard accessory to enter this code, as the shown in the example below. You should only need to enter this code once (or once for each PowerTroll you want to control).
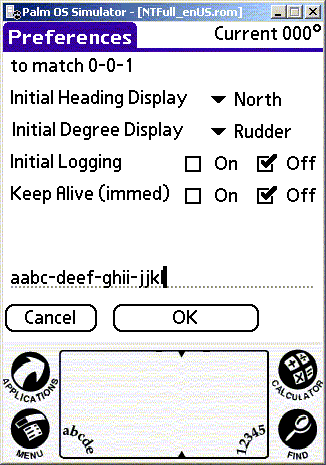
The security code is provided when you buy a copy of the Palm application. See Buy Parts.
One aspect of connection to a real PowerTroll is not simulated, that being reconnection. When connected to a real PowerTroll there is one more option on the form, with three choices: No reconnect, normal reconnect (meaning you get a prompt "do you want to..."), and a "fast" reconnect option that skips the prompt and the splash screen. Reconnect is automatically reset to Off if you reply NO to any reconnection prompt.
Finally there is the ubiquitous About form, telling you to be careful how you use your PowerTroll and crediting some of those who helped me create it. The Arobo version number hides here too, you'll find it scrolling down...